Planning to teach multiplication can be a task as daunting as learning about it for the first time. As a concept, multiplication can be very abstract and hard to imagine. This is the problem that the
A
“Great creations come from the mathematical mind, so we must always consider all that is mathematical as a means of mental development. It is certain that mathematics organize the abstract path of the mind, so we must offer it at an early age, in a clear and very accessible manner, as a stimulus to the child whose mind is yet to be organized.”
-MariaMontessori
What is a Montessori Checkerboard?
Dr.
A
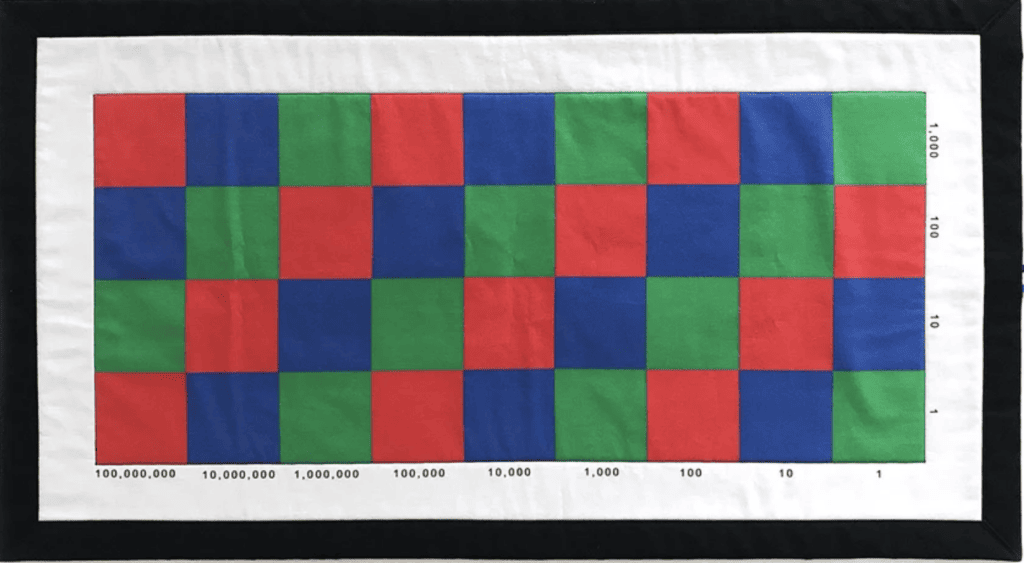
The checkerboard is usually divided into four vertical tiles and nine horizontal tiles. These tiles are color-coded in the same way as the other
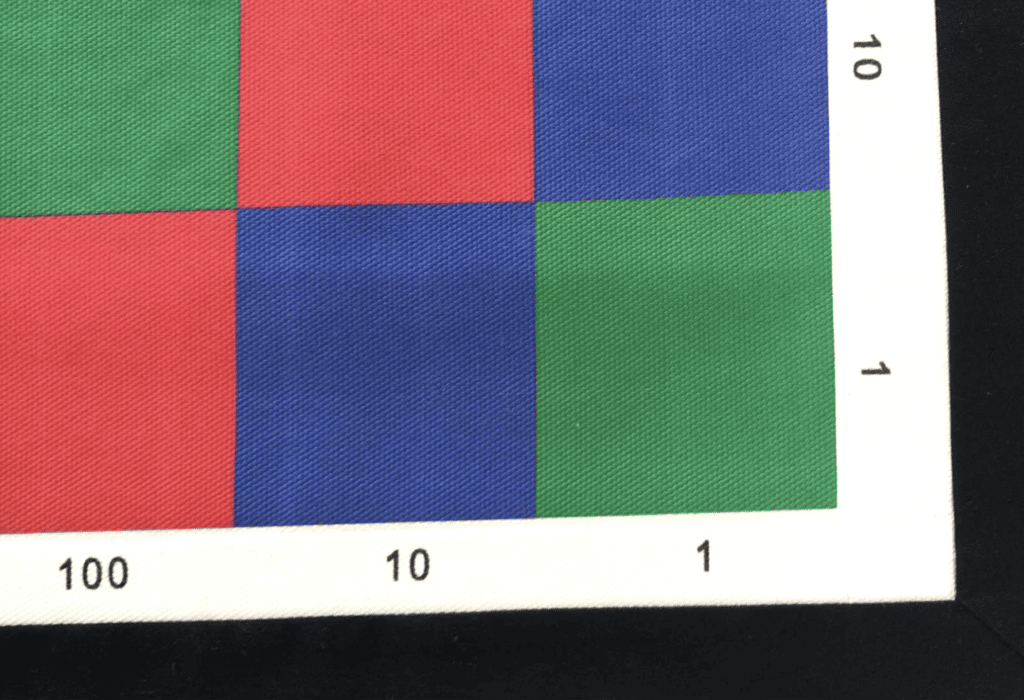
The nine horizontal tiles on the checkerboard are divided into three families, each having its own units, tens, and hundreds: the ones family (1, 10, 100), the thousands family (1,000, 10,000, and 100,000), and the millions family (1,000,000, 10,000,000, 100,000,000). This allows the students to really understand number order, as well as have the chance to play with really big multiplication problems.
There are usually two boxes that come with the board. One box contains the Montessori math beads, which depict the numbers (1-9). The other box contains two different sets of number squares (1-9): grey for the multiplicand (the numbers placed at the bottom ridge), and white for the multiplier (the numbers placed at the right ridge). Both the multiplicand and multiplier number sets are divided into three different groups: green (units), blue (tens), and red (hundreds).
How to use a Montessori Checkerboard
Before you can use a
To multiply using the checkerboard, the students represent a multiplicand at the bottom ridge (say 34 – 3 units and 4 tens) and a multiplier at the right ridge (say 2) using the number squares.
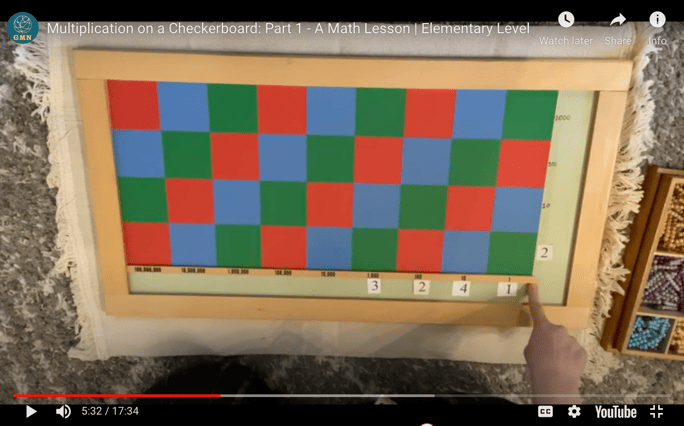
The multiplier 2 is then used to multiply each place value from the multiplicand 34 separately.
2 x 4 = 8
2 x 30 = 60
The students go through the process step by step using the beads. They add two beads of 4 in the green tile (units) to represent the (2 x 4), and two beads of 3 in the blue tile (tens) to represent the (2 x 30). It is important to explain to them exactly what the word “multiply” means.

After the students see the effect of the multiplier on the beads (multiplied their amount by 2), they start representing the final answer by adding all the beads. They put one bead of 8 in the green tile (units) instead of the two beads of 4, and one bead of 6 in the blue tile (tens) instead of the two beads of 3.
Step by step, the multiplication problems could rise both in terms of complexity and magnitude. Allow the students to explore the problems themselves before demonstrating the solution on the checkerboard.
How to Make a Montessori Checkerboard
Having a ready checkerboard can yield many benefits. Some sets, such as Alison’s
However, these ready-sets can be quite expensive. Creating a DIY checkerboard is not that hard and can be done with many different kinds of materials. (obtained from https://kindlingkidsmontessori.wordpress.com/2019/03/13/diy-montessori-checkerboard/)
What you would need is:
- A cabinet backing board (17” X 28”)
- Craft or glitter foam, one sheet for each color (green, blue, red).
- Glue gun
- Ruler
- Scissors or rotary blade
- Black paint pen
First, using the ruler, draw a grid of squares on the back of every foam sheet. Each square should be 7 cm long. Then, use the blade to carefully cut out the squares you’ve made. Lay them on the backing board and make sure they all align (like the picture).
After that, use the glue gun to attach the foam grids to the board. Sand the edges of the board if you need to. Finally, use the paint pen to write down the numerals (1, 10, 100 etc.).
Viola! A fully functional checkerboard for a fraction of the price.
Summary
A
It is a whole-body experience for the student, owing also to the board’s massive size. The student’s use of the beads and the number squares help them reinforce and visualize the relationships between numbers. It grounds their understanding of numbers and math operations in a very concrete, tangible experience that helps them climb to abstraction at their own pace.